I have been a blogging slacker of late. My primary excuse is that my life is a little hellish right now. It turns out that being a single mom most of the week with two kids at home all day and no naps anymore is really fracking hard. So hard that the thought of being on the computer after all the bedtime rigamarole is just really unappealing. My secondary excuse is that we were on vacation.(I intend to post photos this week for sure.) My final excuse is that it's canning time.
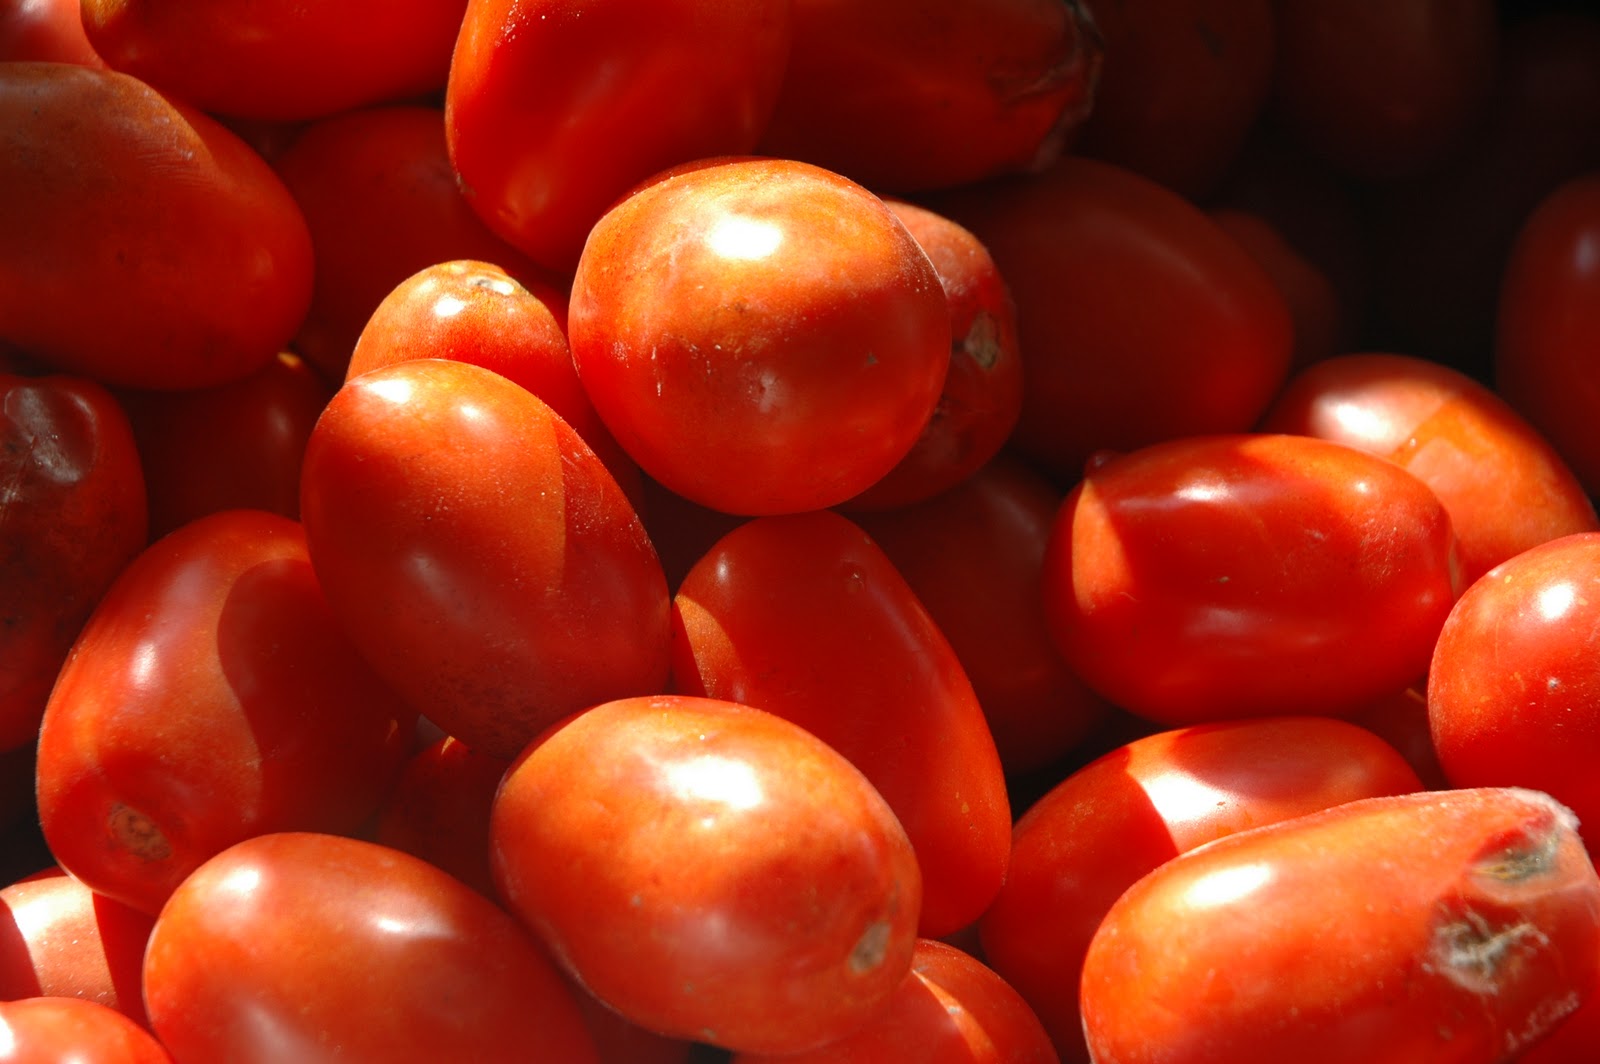
Last year I wrote about my deeply entrenched and completely insane tomato anxiety issue. I would like to say that this has abated over the year, but the fact that we actually used all of the tomatoes I canned and froze last year has only exacerbated the problem. On Friday I actually drove to Shady Maple Farm Market in Lancaster to buy five big boxes (about 1/2 bushel each) of plum tomatoes. (Huge Huge thanks to Marissa at Food in Jars for the lead on this really cool market.) And over the past two days, I have peeled, seeded, chopped and preserved all of those suckers. You know you have issues when it is 9:30 on Sunday night and you and your husband are not even half way done making salsa.
We did most of the heavy lifting yesterday, but I had one more recipe to make today. It is the most delicious tomato jam. I found the recipe last year on Food in Jars. Even if you aren't really into canning. Even if you don't have a bizarre need to freeze dozens of bags of tomato sauce. That is, even if you are a normal person, you should make this jam. All you need is 5 lbs of tomatoes, sugar, a little ginger and a few spices. It is so easy and delicious - makes a great holiday gift for a host, teacher, friend etc. Not for nothing, it also makes your kitchen smell fabulous.
Showing posts with label locally grown. Show all posts
Showing posts with label locally grown. Show all posts
Monday, August 29, 2011

Wednesday, August 3, 2011
Freshest Fish
One of the best things about visiting Cape Cod last weekend was having access to amazing fresh fish. My amazing friend and host, Ellie, is also an amazing cook, so I was happy to let her prepare fish dinners both nights.
 The first night we had Striper, aka Striped Bass, that had been pulled out of the ocean within 24 hours of purchase. Ellie placed the fillet in a tin foil packet, doused it with some white wine, salt, pepper, lemon and thyme and basil from the deck garden and let it steam on the grill. Oh my goodness! It was some of the best fish I have ever had.
 Let me note, that my bar for Striper is pretty high as my father in law catches quite a bit of it in Avalon, NJ. But something about being on vacation, seeing the pier where the fish come in, having a dear friend do the cooking, made this fish dinner particularly wonderful.
 Oh yeah, we also got lobster rolls for lunch. Unbelievably delicious.
Thank you, Ellie, for being a gracious and generous hostess last weekend. And thanks, too, for the over 20 years of enduring friendship. You are the best.
 The first night we had Striper, aka Striped Bass, that had been pulled out of the ocean within 24 hours of purchase. Ellie placed the fillet in a tin foil packet, doused it with some white wine, salt, pepper, lemon and thyme and basil from the deck garden and let it steam on the grill. Oh my goodness! It was some of the best fish I have ever had.

Thank you, Ellie, for being a gracious and generous hostess last weekend. And thanks, too, for the over 20 years of enduring friendship. You are the best.
Tuesday, June 7, 2011
Happy Birthday, Kara!
 |
| My darling 6 year old girl. |
Last week we celebrated Kara's birthday, again, with a big family dinner. She originally wanted to have mac and cheese, Kraft not homemade, but was amenable to a menu alteration in light of the fact that guests were coming too. So Kara went with her second favorite dinner, rotisserie chicken, sweet potatoes, asparagus, cranberry sauce. It was awesome.
With a June birthday, Kara often has strawberry shortcake for her birthday dinner dessert. This year we decided to mix it up and make this Strawberry Cake recipe from Two Peas and Their Pod. My friend Katie introduced us to this amazing dessert when she brought it to a dinner a few weeks ago. I generally don't like cooked berries, but this cake manages to sweeten the strawberries without turning them to unappealing mushy blobs.We served it up with fresh pink whipped cream. Love those gel food colors.
PS: Not for nothing, spring strawberries are one of the best illustrations that locally grown food just plain tastes better. What goes better with birthday cake than a side of food politics?
Friday, May 13, 2011
The First Greens of the Season

The lettuce is up! Woohoo! After being a little tardy in my planting and after a very cold spring, we finally have lettuce to fill our salad bowls. Last night we had a delicious and simple salad of greens, green onions (also from the garden) and shredded carrots (from Trader Joe's).
Aside from the fresh from the garden greens, the two things that make this salad are the shredded carrots and the vinaigrette.
You can buy shredded carrots in a bag at the store and they are perfectly good. But you can also buy a Julienne peeler. I happen to have two, oddly. One my mom gave me after I had been coveting hers and one Dave bought me because I had been coveting my mom's. These little tools are great. Instant fancy salad without the fuss on getting out your mandoline.
As for the vinaigrette, the basic formula is 3 parts oil to 1 part acid, usually vinegar, but citrus juice and soy sauce count too. I usually make vinaigrette in a small mason or jelly jar. Start by adding 2 inches of oil, 1 inch of vinegar and then add any of the following to suit your tastes: mustard, brown sugar, maple syrup, soy, lemon/lime/orange juice. For an Asian variation use rice vinegar and add any or all of the following: soy, hoisin, sriracha, mirin, fish sauce, ginger.
Next time you are contributing a salad to a potluck dinner, make your own dressing too. Homemade dressing is like homemade whipped cream; it invariably impresses folks and has the power to mask a less than impressive salad or dessert. Trust me.
Friday, February 25, 2011
Homemade Ricotta
At some point last summer, I read a recipe that called for fresh made ricotta. And I remember thinking that recipe writers should really avoid making readers feel inadequate while cooking their food.Like when a recipe includes lines like, "Grate a 1/4 teaspoon of fresh nutmeg. If you must use pre-ground nutmeg from a jar, use a bit less." Or "Spoon in 1 cup of ricotta. Freshly made works best." If I am in a grumpy mood, I am likely to utter some variation on, "Who the hell keeps an actual nutmeg around for baking cookies?" or "Get over yourself!"
Despite my knee jerk reaction to be snarky in the face of recipe writers who inflect their writing with a decidedly superior tone, I was intrigued by the idea of making ricotta from scratch. Turns out it is incredibly easy.
Yesterday I gave it a try and the results were amazing. Seriously delicious. So good, that I wonder why I buy ricotta from the store - what I made is so much better than any store bought product I have ever tried. Granted my ricotta purchases are generally from Trader Joe's or Genuardi's, so my sample is limited. That being said, this handmade ricotta is unbelievably good. I used it in lasangna, and I can think of so many other uses: spread it on crusty bread, use it to make ricotta pancakes, roll it up in your burrito or quesadilla, put a thin layer on your pizza crust, add some sugar and top with berries, put it in a pretty jar and give it as a gift. Endless possibilities.
A few other pluses of making your own ricotta: It would be really fun to make with your kids. You can use locally produced, organic milk and make a cheese that costs a fraction of what you would pay in the store for a comparable product. You can brag to your friends and neighbors that you actually made the fresh ricotta that snooty recipe called for.
This recipe is originally from Ina Garten (aka The Barefoot Contessa).


Despite my knee jerk reaction to be snarky in the face of recipe writers who inflect their writing with a decidedly superior tone, I was intrigued by the idea of making ricotta from scratch. Turns out it is incredibly easy.
Yesterday I gave it a try and the results were amazing. Seriously delicious. So good, that I wonder why I buy ricotta from the store - what I made is so much better than any store bought product I have ever tried. Granted my ricotta purchases are generally from Trader Joe's or Genuardi's, so my sample is limited. That being said, this handmade ricotta is unbelievably good. I used it in lasangna, and I can think of so many other uses: spread it on crusty bread, use it to make ricotta pancakes, roll it up in your burrito or quesadilla, put a thin layer on your pizza crust, add some sugar and top with berries, put it in a pretty jar and give it as a gift. Endless possibilities.
A few other pluses of making your own ricotta: It would be really fun to make with your kids. You can use locally produced, organic milk and make a cheese that costs a fraction of what you would pay in the store for a comparable product. You can brag to your friends and neighbors that you actually made the fresh ricotta that snooty recipe called for.
This recipe is originally from Ina Garten (aka The Barefoot Contessa).
- In a large sauce pan combine 4 cups whole milk, 2 cups heavy cream and 2 tsp salt.
- Heat until the milk comes up to a rolling boil.
- Remove from heat and stir in 3 tbsp vinegar. I used just plain white vinegar. (Ina recommends using the best white wine vinegar you can find - again, requirements like that make me get kinda snippy.)
- The milk will start to curdle almost immediately. I let it stand in the pot for about 5 minutes.
- While the milk is curdling, line a large colander or sieve with cheese cloth. Tip: Wet the cloth first so it molds to the sieve. Place the colander/sieve over a large bowl.
- Carefully pour the milk into the colander. Let stand until it becomes as firm as you want it. I let mine drain for about an hour.

It is tough to see, but that is the milk starting to curdle.
My pot looks like that because the milk boiled over - bad chef!

This is right after I poured the milk out of the pot.

This is about 45 minutes later.

Here is a bowl of fabulous ricotta cheese.
Wednesday, January 12, 2011
Meat!

So one of my new year's resolutions was to eat less meat. You may be wondering why, if this was the goal, every inch of freezer space in my house is filled with chicken, pork and beef. It turns out that eating local trumps the less meat thing, at least for the moment.
For the second year now, my dear friend Valerie, who is a supermom and "locovore" extraordinaire, organized a meat buying club or sorts. Val has befriended a farmer in Lancaster County and buys eggs and produce from him regularly. Now, with ten of her friends, we have become big buyers of his meat supply. Bob, the awesome farmer in question, sold us a pig and a half and a whole cow, butchered it, packaged it all, and even loaded Val's minivan. Last Friday, Val's living room was entirely covered in frozen meat. Without an ounce of irony, her friend David pronounced, "It's like a meat locker in here."
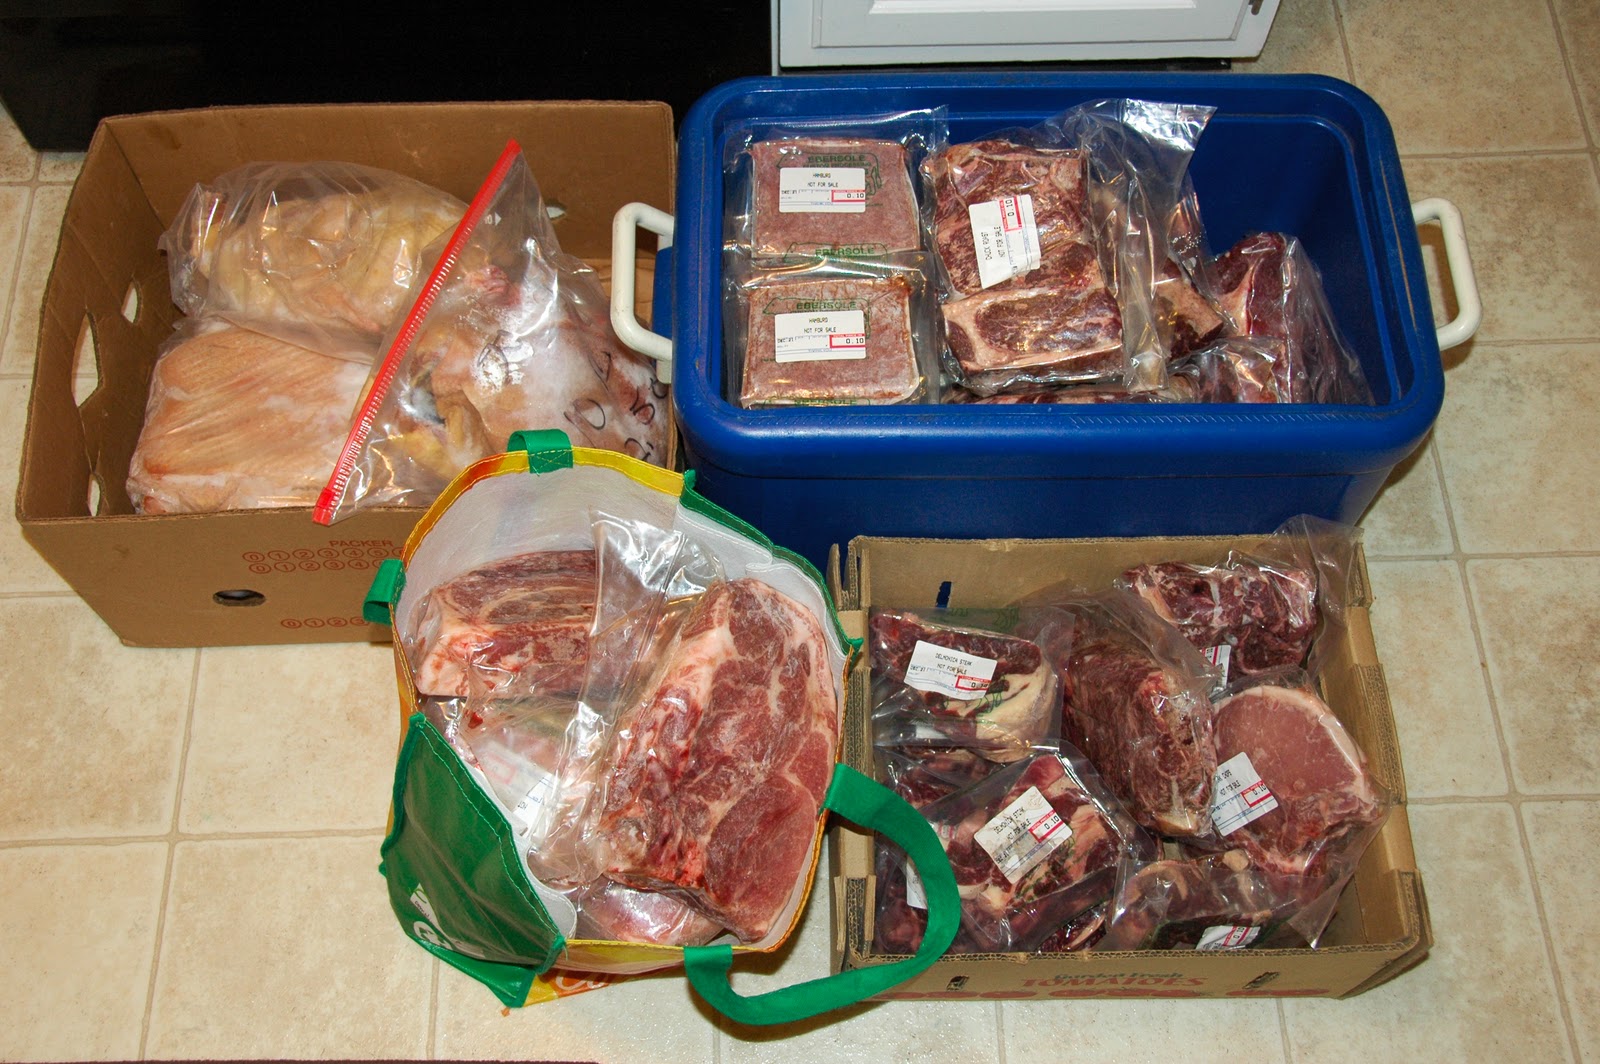
I stupidly forgot my camera when I went to help sort out the meat into individual orders, but here is what my portion looked like when I got it home. That's $300 plus worth of locally-produced, humanely-raised chicken, beef and pork - an unbelievable price for so much high quality food.
Yesterday afternoon I roasted one of the chickens. It was so delicious and yielded a ton of leftovers. (I froze a quart bag full of meat and still had a large Tupperware to use right away.) Next to having the leftovers, I think the best part of roasting a chicken is you get to have a mini Thanksgiving dinner. I made sweet potatoes, stuffing, peas, cranberry sauce that I had preserved in November, and I even whipped up real gravy.
There are many methods to roasting a chicken, here is what I do and it never fails.
- Preheat your oven to 450.
- Take the bird out of the refrigerator and place it in a roasting pan. Remove any giblets, neck etc, and let it come up to room temperature. (True story: The first turkey I ever cooked, I forgot the critical step of taking the giblets etc. out of the body. Yum!)
- In a small bowl combine a few tablespoons of softened butter and spices of your choosing. The classic poultry mix of sage, rosemary, thyme, parsley always works, but you could go spicy, or Mexican, or even Asian if you wanted.
- Pat the chicken dry and sprinkle with lots of salt and pepper. Now slather that bird with your butter/spice mix. Don't be shy with the butter. Make sure to get inside, too.
- If you have it, put a lemon half and a quartered apple inside.
- Use string or skewers to bring the legs in tight to the body of the chicken.
- Put it in the oven and after about 30 min check to make sure the top isn't getting too brown. If it is, just cover it with tin foil. This is also a good time to pour some chicken stock over the bird and into the pan.
- Lower the heat to 350. Check on you chicken every 30 min or so and use a meat thermometer to check if it is done. This is always a little hit of miss for me since I have 2 thermometers that never read the same. I looked it up and the common rule seems to be 20 min/pound. Take that, and all other cooking rules, with a grain of salt. Also, remember that the meat will continue to cook out of the oven, so don't overdo it.
- A tip: If you cook this early in the day to serve for dinner, you can warm up the meat very, very briefly in the microwave. Or if you are nervous that you will turn your gorgeous chicken into disgusting rubber, pouring hot chicken stock over carved meat works really well.
- Heat some chicken broth. Pour juices from roasting pan into a gravy measuring container, a pyrex measuring cup or ziploc bag. Put a few tablespoons of fat and a few tablespoons of butter into the roasting pan over medium-high heat.
- Add two-three tablespoons of flour, depending on how much gravy you want to make and how much pan juice you have. Whisk the flour and fat mixture. Now add the rest of the juices from the pan. If you used a ziploc, cut a small hole in the bottom to release the juice not the fat. I am typically too lazy for that, so I just skim the fat off the top of what it in my measuring cup and pour the rest in the pan.
- Add stock a little at a time and whisk to scrape up the drippings in the pan. At this point you could pour the gravy into a pot. I use my cast iron skillet. Keep adding stock until you get the thickness/flavor you are looking for. I also throw in another pat of butter at the very end - gives it that extra boost of flavor.
- I know this doesn't seem "easy" exactly, as it requires several pans and lots of whisking, but it is SO worth it. If you make way too much, just freeze it for the next time you need gravy on something.
Thursday, November 4, 2010
Got Apples? Make Apple Pie Bars!
A couple of weeks ago, the four kindergarten classes at Kara's school went on a field trip to a local orchard. By the way, kudos to the teachers and staff who took 80 5 year olds on a school trip only two months in to school - Teachers really need to be paid more to organize and then endure days like that. But I digress...the trip, from what I could gather, was a chance to see how a real orchard works. They got to ride the tractor, pick apples and pumpkins. Plus they learned a bit about how the farmers make all of these delicious things come to life year after year. At the end of the day, each student got to bring home a pumpkin, gourd and several apples.

One of the parents who volunteered to go on the trip gave each student in Kara's class a little card with a recipe for apple pie bars. Such a great idea! Kara and I decided to give this recipe a try last weekend. Our family declared it a smashing success. This is a very kid-friendly recipe and, of course, a great way to use some of fall's finest apples.
-Defrost or take out of the refrigerator 2 pre-made pie crusts. (I suppose you could make 2 crusts from scratch, but I generally don't have the energy for that unless it is a special occasion.)
-Peel, core and slice 4-5 apples. You could use anything you have around, but if you want to see what kind of apples work best check out this chart from PickYourOwn.org.
-In a large bowl, toss apples with 3/4 cup sugar (We used 1/2 cup white and 1/4 cup brown.), 1/4 tsp nutmeg, 1/4 tsp cinnamon and a dash of salt.
-Roll out one crust onto a sheet pan. Cover with 1 cup of crushed corn flakes.
-Pile apples on top of corn flakes and cover with second crust.
-Pinch or roll edges to seal. Brush the top with egg white to give it a shiny look.
-Use a small knife to make several vents in the top.
-Cook at 350 for 50 minutes.
Yum! It's like a big apple dumpling.

One of the parents who volunteered to go on the trip gave each student in Kara's class a little card with a recipe for apple pie bars. Such a great idea! Kara and I decided to give this recipe a try last weekend. Our family declared it a smashing success. This is a very kid-friendly recipe and, of course, a great way to use some of fall's finest apples.
-Defrost or take out of the refrigerator 2 pre-made pie crusts. (I suppose you could make 2 crusts from scratch, but I generally don't have the energy for that unless it is a special occasion.)
-Peel, core and slice 4-5 apples. You could use anything you have around, but if you want to see what kind of apples work best check out this chart from PickYourOwn.org.
-In a large bowl, toss apples with 3/4 cup sugar (We used 1/2 cup white and 1/4 cup brown.), 1/4 tsp nutmeg, 1/4 tsp cinnamon and a dash of salt.
-Roll out one crust onto a sheet pan. Cover with 1 cup of crushed corn flakes.
-Pile apples on top of corn flakes and cover with second crust.
-Pinch or roll edges to seal. Brush the top with egg white to give it a shiny look.
-Use a small knife to make several vents in the top.
-Cook at 350 for 50 minutes.
Yum! It's like a big apple dumpling.
Sunday, October 31, 2010
Pumpkin - Part 1
Gary, my neighbor down the street, runs a little farm stand that he stocks by going out to Lancaster County once a week. He buys fresh produce from local farmers and sells their goods right outside his house. This old-school farm stand is one of the many things I love about my neighborhood.
After living here for over a year, I finally clued in to the fact that I might be able to place an order with Gary. I was really looking for a cheaper way to score good eggs for my family. I can get local eggs at Maple Acres, but they charge $4.00/dozen which is pretty steep. Gary was happy to oblige - and he found me eggs for $1.75/dozen.
Now that Gary and I have a relationship that goes beyond "Hi" and "Thanks," I have gotten up the nerve to ask him to find some other things like cooking apples, tomatoes, honey and a cooking pumpkin. Yep, I have this idea that I will make my own pumpkin puree. And the pumpkins we buy for jack-o-lanterns aren't especially good for eating, I am told.

This is what a cooking pumpkin looks like. I will admit that when I saw this, I considered that Gary was just messing with me. But he doesn't seem the type. And his friend, Nancy, was there and she said that this was in fact a baking pumpkin. Perhaps they were in it together?

Do you like how they wrote my name on it? In case there was a run on crazy looking pumpkins, Gary was looking out for me. Though we have clear rules about drawing on paper only, Kara decided that writing on a pumpkin that was already written on was fair game. I concurred.

By the way, it's huge. Here is Kara holding it for the purpose of perspective. She declared it to be one funny looking punkin'.
Dave's comment: "How are you going to cook that exactly?" Part 2 with all the info coming soon....
After living here for over a year, I finally clued in to the fact that I might be able to place an order with Gary. I was really looking for a cheaper way to score good eggs for my family. I can get local eggs at Maple Acres, but they charge $4.00/dozen which is pretty steep. Gary was happy to oblige - and he found me eggs for $1.75/dozen.
Now that Gary and I have a relationship that goes beyond "Hi" and "Thanks," I have gotten up the nerve to ask him to find some other things like cooking apples, tomatoes, honey and a cooking pumpkin. Yep, I have this idea that I will make my own pumpkin puree. And the pumpkins we buy for jack-o-lanterns aren't especially good for eating, I am told.

This is what a cooking pumpkin looks like. I will admit that when I saw this, I considered that Gary was just messing with me. But he doesn't seem the type. And his friend, Nancy, was there and she said that this was in fact a baking pumpkin. Perhaps they were in it together?

Do you like how they wrote my name on it? In case there was a run on crazy looking pumpkins, Gary was looking out for me. Though we have clear rules about drawing on paper only, Kara decided that writing on a pumpkin that was already written on was fair game. I concurred.

By the way, it's huge. Here is Kara holding it for the purpose of perspective. She declared it to be one funny looking punkin'.
Dave's comment: "How are you going to cook that exactly?" Part 2 with all the info coming soon....
Thursday, October 28, 2010
Smitten Kitchen Pickles
The weather in the Philadelphia area has been strange this week. Despite the fact that we are a few days from Halloween, it has felt almost tropical since Sunday. Wet, sticky, rainy, all around it's been more like a week in August than October. Feeling like summer outside inspired me to seek out some of the last summer vegetables. Kirby (or pickle) cucumbers are still around at my local farm stand, so I decided to stock up before fall arrives for real.
One of my favorite discoveries this summer was the food blog Smitten Kitchen. Written by Deb Perelman from her tiny kitchen in New York City, SK is a gorgeous site with accessible, interesting recipes. I especially like that Deb is a seasonal cook - her recipes make the most of whatever is locally grown in and around the New York area. She even has her recipes archived by season.
Back to the cukes...I love bread and butter pickles, especially the homemade variety. I love sweet pickles so much that I will eat the scary florescent green ones from the grocery store, but I generally try to avoid foods that are a color I might see in Kara's marker box. My stepmother used to can her own bread and butter pickles which is probably what accounts for my current day addiction to them. I have never been able to replicate her success, however. One day this summer, to my great pleasure, Smitten Kitchen's post of the day was on quick bread and butter pickles. Here is the recipe. These are so good. So fresh and sweet and crisp. The perfect addition to a sandwich or burger. Or, as Deb suggests, a great gift for the host of a party. They will keep in your refrigerator for about a month, if they last that long.
We liked these pickles so much that I applied the same principles in her recipe to "quick pickle" jalapeno peppers. Also delicious. If you find some Kirby cukes that are hanging on from the summer, give these pickles a try. And if you can't find any decent cucumbers or, for some strange reason, bread and butter pickles don't do it for you, consider giving quick pickling a try with the vegetable of your choice. Carrots, cauliflower, onions, green beans are all good candidates in the fall.
Here are two other takes on the quick pickling: New York Times blog - Quick Pickling and Mark Bittman's Quick Pickles.You can also Google "quick pickles" or "refrigerator pickles" and you'll find countless recipes. Give it a try. This is another one of those cooking techniques that is really easy and yields impressive results.
One of my favorite discoveries this summer was the food blog Smitten Kitchen. Written by Deb Perelman from her tiny kitchen in New York City, SK is a gorgeous site with accessible, interesting recipes. I especially like that Deb is a seasonal cook - her recipes make the most of whatever is locally grown in and around the New York area. She even has her recipes archived by season.
 |
| Deb Perelman's Bread & Butter Pickles |

Back to the cukes...I love bread and butter pickles, especially the homemade variety. I love sweet pickles so much that I will eat the scary florescent green ones from the grocery store, but I generally try to avoid foods that are a color I might see in Kara's marker box. My stepmother used to can her own bread and butter pickles which is probably what accounts for my current day addiction to them. I have never been able to replicate her success, however. One day this summer, to my great pleasure, Smitten Kitchen's post of the day was on quick bread and butter pickles. Here is the recipe. These are so good. So fresh and sweet and crisp. The perfect addition to a sandwich or burger. Or, as Deb suggests, a great gift for the host of a party. They will keep in your refrigerator for about a month, if they last that long.
We liked these pickles so much that I applied the same principles in her recipe to "quick pickle" jalapeno peppers. Also delicious. If you find some Kirby cukes that are hanging on from the summer, give these pickles a try. And if you can't find any decent cucumbers or, for some strange reason, bread and butter pickles don't do it for you, consider giving quick pickling a try with the vegetable of your choice. Carrots, cauliflower, onions, green beans are all good candidates in the fall.
Here are two other takes on the quick pickling: New York Times blog - Quick Pickling and Mark Bittman's Quick Pickles.You can also Google "quick pickles" or "refrigerator pickles" and you'll find countless recipes. Give it a try. This is another one of those cooking techniques that is really easy and yields impressive results.
Monday, October 25, 2010
Creamy Dreamy Fall Soup

After 20 minutes or so, I gathered up our stuff and stepped up to the register and was stunned by the huge stalks of broccoli. They were gorgeous and the price, $1.50 for 2 bunches, was unbelievable. Then, my neighborhood farm stand was offering cauliflower for $.50 a head, so I couldn't resist buying a few. Now my kitchen was filled with these fabulous fall vegetables, but after serving us steamed and/or roasted broc/cauliflower three nights in a row, I needed a change.
I remembered that I love broccoli cheddar soup. Even the industrially produced stuff you get in a cafeteria or a Fridays. Love it. So I scoured the internet for some recipe ideas and found quite a few to go on. Given that I had a plethora of seasonal veggies lying around, I adapted the basic principles for making a creamy soup. The result was stupendous. It was really easy, and, as usual, it made a ton of soup. (I am incapable of making a small amount of soup, I have learned.)
Here's the basic idea:
-Cut up and steam 1 large head of broccoli and 1 large head of cauliflower. If you have leftovers, perfect.
-In a large pot or dutch oven, fry up
- one large chopped onion
- 3-4 celery stalks finely chopped
- 3-4 carrots finely chopped
-Fry up for a few minutes. When the potatoes start to brown up, dump all of the contents of the pan out into a bowl.
-Now use the same pot to make a cream sauce. Turn the heat to medium/low. You could start by deglazing the pot with stock or white wine. But if you want to skip this step, just put 1/2 stick of butter in the pot and let it melt. Don't burn it. That is tragic. When the butter is bubbly, add a 1/4 cup of flour and whisk for a couple of minutes as the flour gets nice and golden.
-Slowly pour in 2 cups of whole milk. You could use some half and half, too, if you are feeling decadent. Whisk constantly as the mixture thickens.
-Add 3 cups of stock (chicken or veggie) and keep stirring.
-Put the all of the cooked veggies in the creamy liquid. If you need to, add more milk/stock to cover the veggies.
-Cook the soup for about 30 minutes or so. You want all of the vegetables to be soft.
-Use an immersion blender to puree the soup. If you don't have an immersion blender, I urge you to get one. They are inexpensive and invaluable for making soup, tomato sauce, smoothies, etc... Seriously, transferring soup to a blender is a pain. Just say no. And just say yes to immersion blenders.
-Add 2-4 cups of grated cheddar cheese, depending on how cheesy you like your soup. You could also add some swiss or Gruyere. I will admit that I added about 1/2 cup of Velveeta.
-Stir it up until the cheese melts. Add salt, pepper to taste and more milk/stock if your soup gets too thick.
Enjoy!
Saturday, October 16, 2010
The Gateway Fruit
Fall has arrived here, that much is certain. Cooler nights, windy days, and a renewed need to wear a sweater and slippers around the house during the day. And of course, there are the apples. At our local farm, they have lined the shopping area with huge wooden boxes and filled them with all kinds of locally grown apples. If you are looking to "go local" with your food shopping, think of apples as your gateway produce. They can be found just about anywhere. They are cheap. And, in my experience, it is hard to find a bad apple.

Now that I think of it, every place I have lived in my adult life has had local apples in the fall. In New York City, I used to grab a bag at the Union Square farmers market on Saturdays or at Fairway on a weekday walk. In DC there were several apple stands at Eastern Market just a few blocks away from our place on Capitol Hill. And here in Philadelphia there are farmers markets, farm stands and even local produce in the big chain grocery stores. My sister in law and her family have their own "Apple Guy" who not only sells delicious fruit, but makes pretty accurate long range weather predictions.
I took my kids out to Maple Acres Farm on Wednesday and we had lots of fun running around inspecting the many pumpkins and gourds for sale. It was my intention to just buy a sampling of apples to see what is tasting good this season. But I was distracted by the big basket with a sign on it that read, "Baking Apples $.50/lb." ("Baking apples" = bruised and battered apples that no one will buy.) And when the owner agreed to sell the bunch to me for $6.00, I knew that there was an applesauce project in my future. By Friday night our cheapo box of galas, McIntosh and golden delicious apples was transformed into 5 quarts of applesauce. It is so yummy and it made our whole house smell like apple pie. A perfect fall treat.

Making applesauce is so easy, it barely requires a recipe, but here is the basic idea:

Now that I think of it, every place I have lived in my adult life has had local apples in the fall. In New York City, I used to grab a bag at the Union Square farmers market on Saturdays or at Fairway on a weekday walk. In DC there were several apple stands at Eastern Market just a few blocks away from our place on Capitol Hill. And here in Philadelphia there are farmers markets, farm stands and even local produce in the big chain grocery stores. My sister in law and her family have their own "Apple Guy" who not only sells delicious fruit, but makes pretty accurate long range weather predictions.
I took my kids out to Maple Acres Farm on Wednesday and we had lots of fun running around inspecting the many pumpkins and gourds for sale. It was my intention to just buy a sampling of apples to see what is tasting good this season. But I was distracted by the big basket with a sign on it that read, "Baking Apples $.50/lb." ("Baking apples" = bruised and battered apples that no one will buy.) And when the owner agreed to sell the bunch to me for $6.00, I knew that there was an applesauce project in my future. By Friday night our cheapo box of galas, McIntosh and golden delicious apples was transformed into 5 quarts of applesauce. It is so yummy and it made our whole house smell like apple pie. A perfect fall treat.

Making applesauce is so easy, it barely requires a recipe, but here is the basic idea:
- Peel and core apples; cut into small chunks.
- Put chunks in large pot and add a little water or apple cider to help them get steamy.
- Cook on medium heat until they are soft and mushy. You can add sugar or spices if you desire. I usually don't add a sweetener, but I do add cinnamon, ground cloves and nutmeg.
- You can easily preserve applesauce in jars. Here are some good instructions from Pick Your Own, a great website for guidance on how to preserve all manner of produce.
- If you don't want to go through the canning process, you can freeze the applesauce and/or it will keep in your refrigerator for several weeks.
Tuesday, October 12, 2010
Salsa
It turns out, however, that canning is the perfect cooking application for Dave because, unlike me, he is a very precise cook. His mother's mantra is, "If you can read, you can cook." And Dave takes this to heart; he chooses a recipe and he follows it to the letter. The notable exceptions to this rule are his chili, pulled pork and hamburger stroganoff -- three of his cooking masterpieces.
Canning, though, lends itself to Dave's natural tendency to follow directions. And in case you didn't know, canning is cooking on the edge. Because, while eminently satisfying to preserve a whole box of tomatoes in a few jars, canning turns this project into a daring kitchen feat. Measure incorrectly, fail to maintain the proper PH, compromise your seals, improperly sterilize the jars, and you will have a big bunch of botulism on your hands instead of the "taste of summer" you were hoping for.

Needless to say, a cook like me, needs a man like Dave in the kitchen when there is canning going on.
I am proud to say that Dave happily did his own share of the preserving last weekend making a yummy looking salsa. (God knows there were plenty of tomatoes to use in this project.) I cannot wait to try it this winter.
Here is the recipe from the Ball Complete Book of Home Preserving:
-In large, non-reactive pot combine:
- 7cups chopped, peeled tomatoes
- 2 cups coarsely chopped onion
- 1 cup chopped green bell pepper
- 8 chopped jalapeno peppers - the more seeded and de-pithed, the less hot they will be
- 3 cloves garlic finely chopped
- 1 can tomato paste (5.5 oz.)
- 3/4 cup white vinegar
- 1/2 finely chopped cilantro -- loosely packed
- 1/2 tsp. cumin
-Prepare jars and lids (See Ball website for directions.)
-Ladle hot salsa into hot jars leaving 1/2 inch headspace. Process 8 oz or pint jars for 20 minutes in water canner. Let cool and check seals before storing in a cool, dark place.
Thursday, October 7, 2010
Tomato Anxiety Syndrome

In an effort to eat locally, more or less, throughout the year, I have been attempting to preserve the summer bounty for winter use. Last year, I started with tomatoes. My mom and I bought a bushel from a local farm and spent a sweaty, but very fun, afternoon peeling, seeding and cooking them up into a delicious tomato sauce. At the end we all enjoyed a fabulous spaghetti dinner. And throughout last winter, we ate our way through the sauce I had frozen in August.
But it all went so fast.


Subscribe to:
Posts (Atom)